Cleaning mortar off tile can be a painstaking yet necessary task to ensure your tiles look pristine and polished. Whether you’re dealing with freshly laid tiles or an older installation, removing mortar can breathe new life into your flooring. This blog post will guide you through several methods to clean mortar off tiles effectively. We’ll cover a range of techniques from thoroughly washing your tiles to using specialized thinset removal tools and acidic cleansers. We will also provide personal recommendations for best practices and tools to make the job easier. Finally, we will discuss manual removal methods meticulously, ensuring that whichever strategy you choose, you will achieve the best results possible.
Wash Tiles Thoroughly
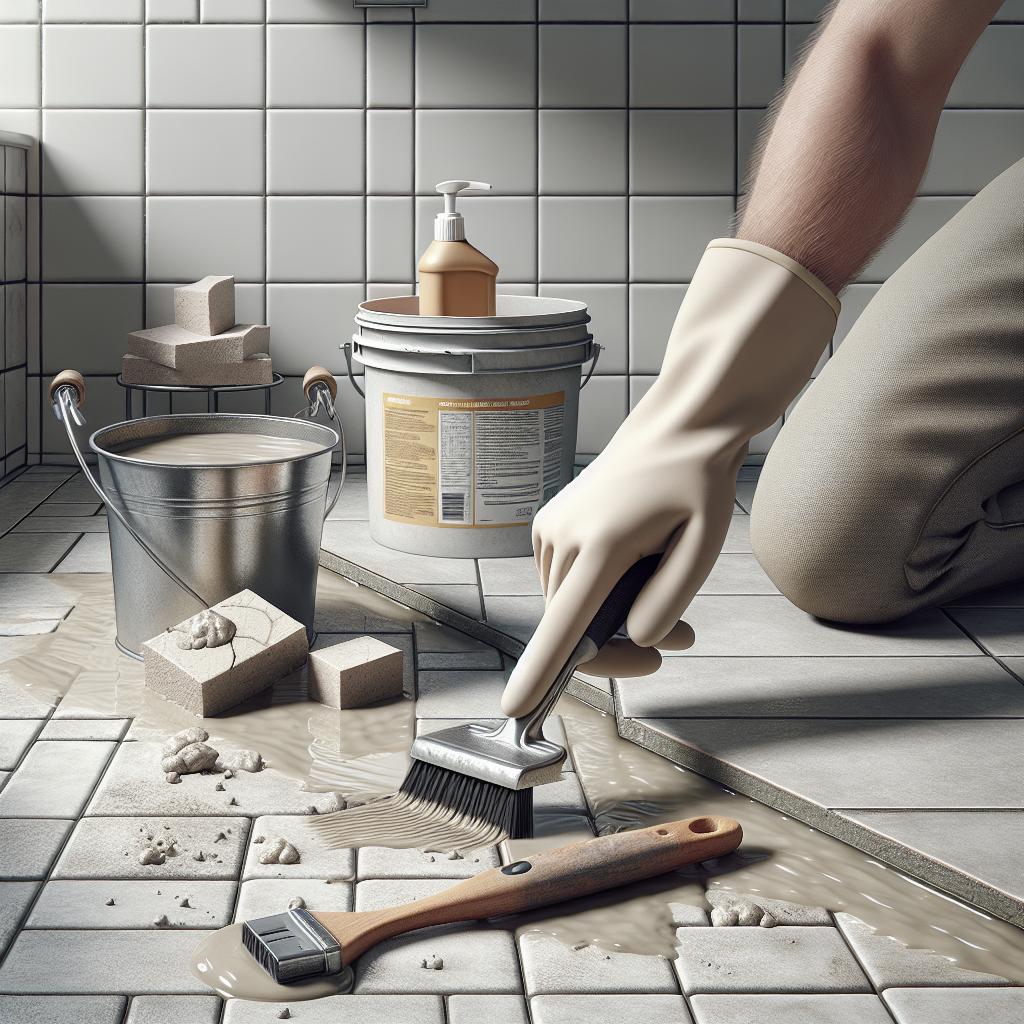
Before diving into more aggressive methods, it’s essential to start by washing your tiles thoroughly. Begin with a bucket of warm water, a mild detergent, and a soft cloth or sponge. This initial step helps to remove any loose particles of mortar that might have accumulated on the tile surface, making it easier to identify and tackle the more stubborn spots later on. While washing, pay close attention to the tile joints where mortar is most likely to hide. Use a scrub brush with soft bristles to avoid scratching the tile surface. Rinse the tiles frequently to ensure no detergent residue remains. Washing thoroughly sets the stage for more advanced cleaning methods by revealing areas that need more specialized attention. After washing, let the tiles dry completely. Moisture can make mortar removal more difficult, so ensuring a dry surface is crucial. This simple but vital step can save you time and effort in the long run.
We Recommend
For optimal results, we recommend using a pH-neutral cleaner specifically designed for tiles. These cleaners are effective in dissolving dirt and grime without damaging the surface. A product like Aqua Mix Concentrated Stone and Tile Cleaner provides an excellent starting point. It’s powerful yet gentle, making it a superb choice for maintaining the integrity of your tiles while loosening stubborn mortar residue. Additionally, investing in a good quality tile scrub brush can make a world of difference. Brushes with ergonomic handles and replaceable heads can provide both comfort and longevity, streamlining your cleaning process. Finally, combining your chosen cleaner with microfiber cloths can enhance your results. Microfiber is excellent at trapping dirt and debris, ensuring that your tiles are as clean as possible before moving on to more intensive methods.
Use a Thinset Removal Tool
For more stubborn mortar, a thinset removal tool can be invaluable. These tools often come with replaceable blades designed to scrape off mortar without damaging the tile surface. Tools like the Fein Multimaster Oscillating Tool can make quick work of hardened thinset while providing precision and control. Using the thinset removal tool involves running the blade or head over the mortar spots gently. It’s important to use a steady hand to avoid chipping or scratching the tiles. Work in small sections to maintain control and ensure thorough removal. The goal is to break the thinset into smaller, more manageable pieces that can then be wiped away. Maintaining the tool regularly is also crucial for optimal performance. Clean the blades after each use and replace them as needed to ensure they remain sharp and effective. This routine care not only prolongs the life of the tool but also guarantees more efficient mortar removal.
Use Acidic Cleansers
Acidic cleaners can be another powerful weapon in your arsenal for removing mortar from tiles. These chemicals react with the alkaline components in the mortar, effectively breaking it down. However, it’s important to use these products cautiously because they can be harsh on both the tiles and your skin. Before applying an acidic cleaner, read the manufacturer’s guidelines for both the tile and the cleaner to ensure compatibility. Products like Muriatic Acid and TileLab Sulfamic Acid Cleaner are often recommended, but they should be diluted according to the instructions. Always use gloves and eye protection when working with acidic cleansers. Apply the diluted solution with a sponge or soft cloth, focusing on the mortar spots. Allow it to sit for a few minutes to soften the mortar, then scrub gently. Rinse the area thoroughly with water to remove any chemical residues. Repeat the process if necessary, but avoid over-application as it could damage the tile surface.
We Recommend
For those looking to utilize acidic cleansers, we recommend TileLab Sulfamic Acid Cleaner. It is effective yet more user-friendly compared to harsher alternatives like Muriatic Acid. Always ensure proper ventilation when using these products by opening windows and using fans to circulate air, minimizing exposure to fumes. To further safeguard your tiles, consider pre-treating them with a sealant. This can provide an extra layer of protection against the acidic reactions, keeping your tiles in top condition throughout the cleaning process. Invest in high-quality protective gear such as nitrile gloves and safety glasses. These essential items can offer peace of mind and physical protection, allowing you to focus on the task without concern for your safety.
Remove Thinset Manually
If chemical and tool methods are not entirely effective or if you prefer a more hands-on approach, manual removal is a viable option. Using basic tools such as a putty knife, chisel, and hammer, you can scrape off the thinset bit by bit. While this method is labor-intensive, it offers unparalleled control, minimizing the risk of tile damage. Begin by carefully inserting the putty knife or chisel at the edge of the mortar spot, applying gentle pressure to lift it away from the tile. Work slowly and methodically to avoid chipping the tile. Sometimes, tapping the tool lightly with a hammer can help dislodge more stubborn fragments. To protect the tiles further, consider placing a thin, firm barrier like a plastic sheet between the tool and the tile surface. This can help prevent accidental scratches and marks, ensuring a flawless finish. Manual removal does require patience, but the results are often worth the effort. It’s an excellent approach for tackling small areas or intricate tile designs where precision is crucial. Future Prospects:
| Method | Tools Required | Pros | Cons |
|---|---|---|---|
| Wash Tiles Thoroughly | Warm water, detergent, soft cloth | Easy, safe for all tile types | May not remove stubborn mortar |
| We Recommend (pH-neutral cleaner) | Aqua Mix Concentrated Cleaner, tile scrub brush, microfiber cloths | Effective, gentle on tiles | Initial cost of cleaner |
| Use a Thinset Removal Tool | Thinset removal tool, replacement blades | Highly efficient, precise | Risk of scratching tiles |
| Use Acidic Cleansers | TileLab Sulfamic Acid Cleaner, gloves, eye protection | Very effective on tough mortar | Can be harsh, risk of tile damage |
| We Recommend (Safety and preventative) | Sealant, nitrile gloves, safety glasses | Additional protection, peace of mind | Extra steps, cost |
| Remove Thinset Manually | Putty knife, chisel, hammer, plastic barrier | Precise, controlled | Labor-intensive, time-consuming |
By following these methods and recommendations, you can tackle mortar removal with confidence and precision. With the right tools, products, and precautions, your tiles will regain their original beauty, and you will have gained valuable skills for future tile maintenance projects.